Introduction to Pastelmat, Panpastel and Pastel pencils

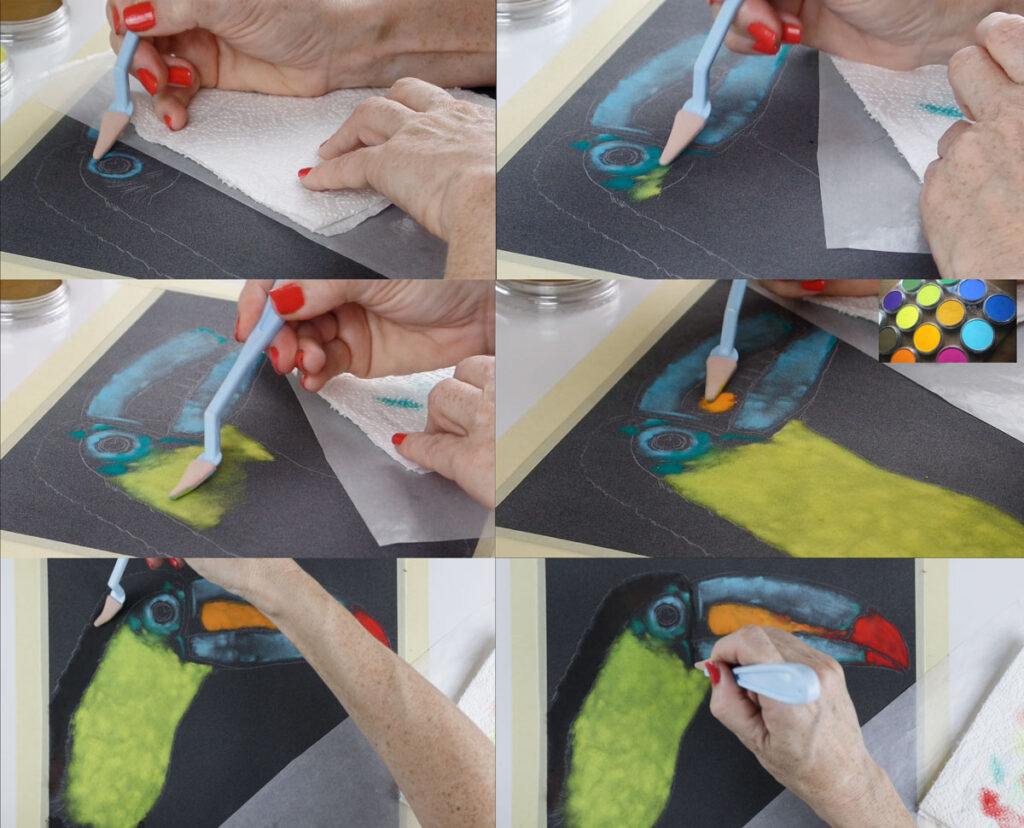
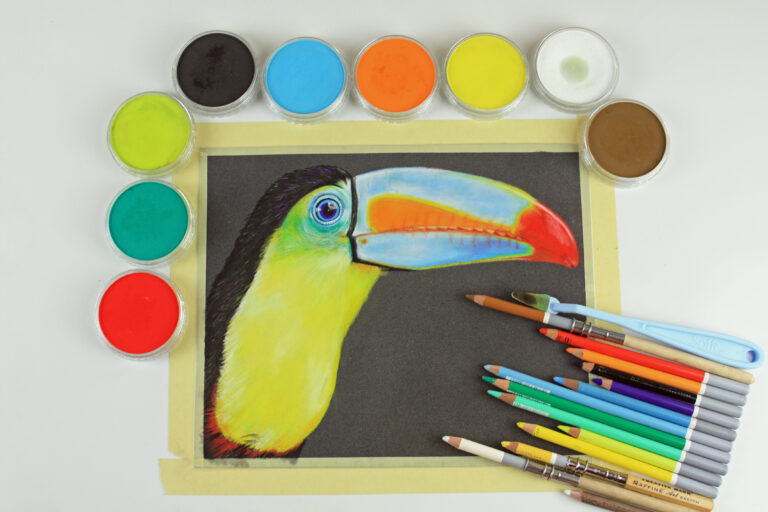
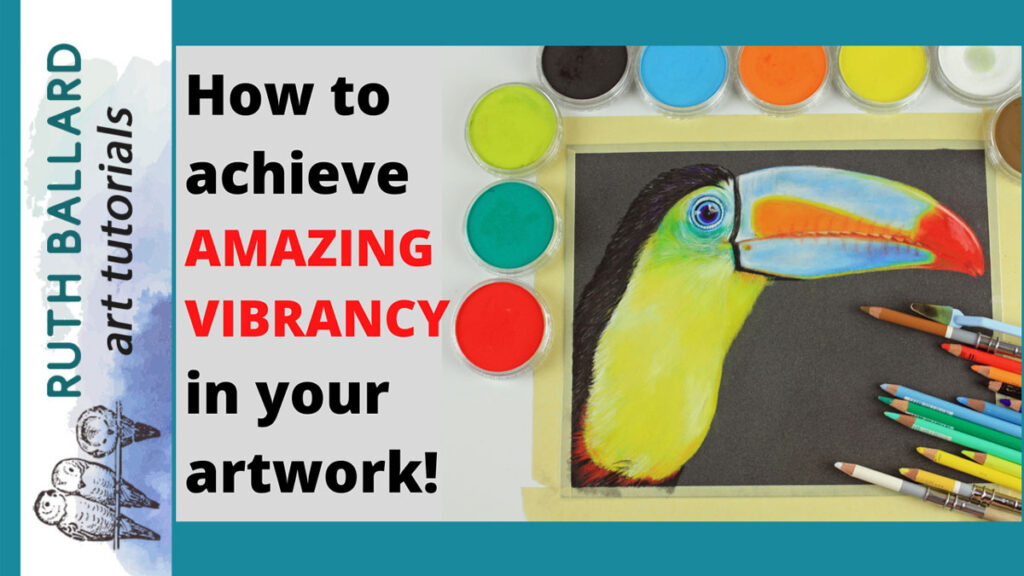
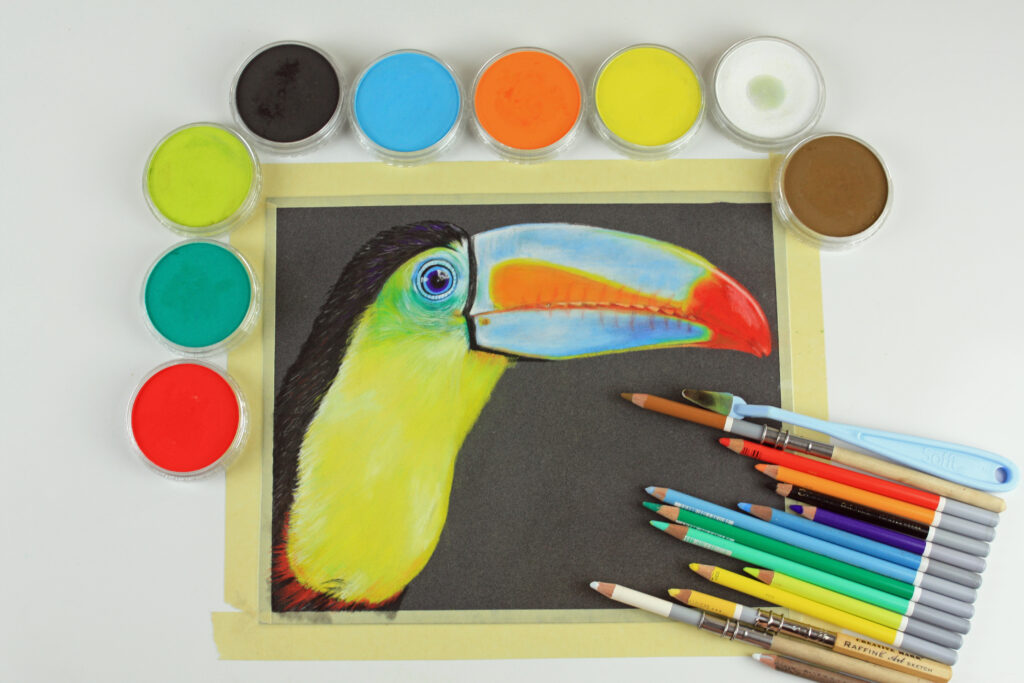
Pastelmat is a unique surface for a wide variety of mediums. While pastels are a great choice, it can also be used with charcoal and colored pencils.  It’s thick enough for wet mediums and comes in a variety of colors. To create this toucan with panpastels and pastel pencils, I’m using Anthracite, a dark charcoal color.

Large sheets of pastelmat offer the better value than the pads and can be cut to size.  Avoid bending or folding the sheets and store them flat. Between the sheets is a waxy paper called glassine. It’s useful to shield oily hands when creating artwork, so don’t discard it.  

Panpastels are little cakes of concentrated pigment, used like paint. They’re sold in a powdered form with a screw top lid. They’re applied using sponge applicators. Concentrated and vibrant, colors can be used as is, or mixed together. They can be purchased individually or in sets.

I recommend a set that includes primary colors to begin, then build as you become accustomed to them. They’re more economical than soft pastels, there’s little dust and no messy cleanup.

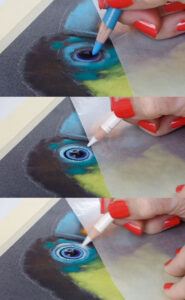
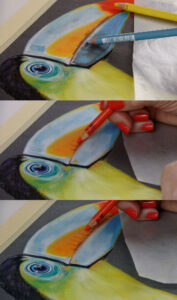
There are five different shaped applicators, but I like the triangular one as it’s easy to get into small areas. Instead of cleaning them, simply wipe with a paper towel or cloth to remove the pigment.

The real blending with panpastels is done with layering. It’s a different technique than blending with pastel sticks, which are smoothed without tools. Panpastels won’t move when they’re on this surface, so the way to blend them is to add thin layers on top of each other.  I love using them for establishing backgrounds. 

My first layer provides enough coverage and lays down quickly and easily, so I’m able to continue with pastel pencils to achieve some finer details.

I’m using Stabilo Carbothello pastel pencils, but any brand of pastel pencils will achieve similar results. Pastel pencils are perfectly matched with pastelmat, because light colors can be placed over dark.

Pastelmat is superior to other surfaces, because mistakes can easily be corrected. I originally misplaced the highlight in the eye, but with simple layering, was able to correct it. This forgiving ability is a huge advantage compared to other papers .

Pastel pencils can be mixed together on the surface in the same way as panpastels. Even though the largest set of Stabilo Carbothello’s is only 60, you’ll actually use all the colors in the set.

Throughout the drawing I used a light pressure. I was able to apply several layers in the drawing until I was satisfied with my toucan. 

Supplies used:
Anthracite Pastelmat 
Panpastels set of 10
Sofft tools
Carbothello pencils
General’s sharpener
Masking tape
(Amazon affiliate links)

You can see how I created this Toucan from start to finish here:

Create a realistic looking Iris with my FREE colored pencil drawing class! 

This video tutorial includes a copyright-free reference, traceable line art, supply list and colored pencil swatch.
I talk you through all the techniques required to begin creating an iris botanical illustration from start to finish!

Colored Pencils – A Complete Beginner’s Guide 

All the information you need to start creating beautiful drawings is contained within this gorgeous 20-page guide! It’s jam-packed with articles recommending the best pencils and papers to use as well the great tools to guide your artistic journey. Offering tips, techniques and inspiration, it’s yours FREE to download!


Iris-for-free-resources-pag