airbrush kit
This complete kit by Master includes everything you need to begin airbrushing. It includes the airbrush, a 6-foot hose and an air compressor.
I used this for many of the backgrounds shown in my Gallery. It’s a really fast way to create gorgeous backgrounds in your work. The cup size is large to hold a decent amount of paint. It’s portable, quiet and is simple to use. You can attach the hose, plug it in and start practicing right away. It’s a good deal for the price.
Holder
The kit comes with an airbrush holder, but it’s flimsy and breaks easily. It’s best to get a decent quality one. I love this airbrush holder with a clamp. It sits right next to my easel at arm level and doesn’t shift around.
paints
You’ll need acrylic paint. You can use whatever brand you like, but I like Apple Barrel paints. You don’t need ALL the colors as using an airbrush over time naturally teaches you how to mix colors. This is a good starter set.
Craft paint isn’t designed for airbrush use but with a workaround, can be used. All you need to do is dilute with distilled water and add a little medium. There’s no exact ratio but approximately 1 part water to 1 part paint, mixed to the consistency of skim milk. Then add a 3 or 4 drops of airbrush medium. This mix provides the right viscosity to reduce clogging.
I suggest creating your mix in these clear containers. I like to see what colors I’m using as well as mix my dilution in advance.
Airbrush medium
Airbrush medium is very important if you want to use any brand of acrylic paint. I use Golden Medium with craft paints.
Golden Medium will eliminate clogging and tip build-up which are the major drawbacks of airbrushing.
Miscellaneous
A water container. I like this one because it has ridges on the base which cleans the brush well between uses.
An old brush
Rags, paper towels, old towels for draping over surfaces, as acrylic dries permanently.
An empty coffee canister for blowing through color and water, or a pot filter jar to contain your excess paint.
Some tiny tools handy for when you clean your airbrush.
cleaner
I recommend this good quality airbrush cleaner. I just add a few drops to sit inside the airbrush after I’ve thoroughly blown out all the paint and rinsed it through with distilled water. I don’t take apart my airbrush to clean all the individual parts very much (although it’s a good idea to know how). But I am meticulous about making sure all the acrylic paint is rinsed through thoroughly. Don’t let old, dry paint sit in an airbrush!
Drawing board
A drawing board is really nice to own. I take it from my easel to my art table and bring it along on my travels. This one’s made from masonite, and will last you for many years.
masking tape
I’ve used many brands. The last thing you want, after spending many hours working on your artwork, is ripped paper! The only masking tape that I’ve found that doesn’t rip is Scotch Tape 2380. I don’t risk using anything else, so this is the only one I use. When removing tape, pull away from the artwork slowly.
Stencils
To achieve a fast bokeh (out of focus) background, use a stencil. This one includes both hexagonal and circle shapes. Just use masking tape to close the openings you don’t need to spray.
mask
Instead of using expensive frisket film to block subject areas, I use a sticky drawer liner. It’s repositionable and easy to remove. I like to use it for masking off an areas so I can apply colored pencils.
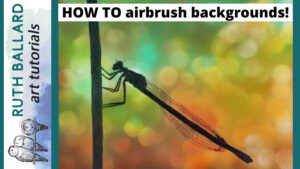
Click on my how-to VIDEO to show you how to create and apply a mask.


